When you think of building a website, most people’s first reaction is “oh, I don’t know how to do that!” or “oh man, that’s too hard!” But it doesn’t have to be. You can build a website relatively easy these days, but there are a lot of step and things involved that may scare beginners away. When I first started online, I had no idea WHERE to start, and every tutorial or article I read gave me just a little more understanding and information, but it also gave me a lot more information that I had to research, which null and voided my understanding. My head felt like it was in a spiraling down slope avalanche…every time I’d think I had a grasp on something, another article would bring to my attention 2 or 3 more things I that I had absolutely no idea about. For me, learning how to build a website was one of the most frustrating things I had to learn.
There is good news though. Once I finally found all the pieces of the puzzle (a.k.a information) that I had to put together to build a website, it became very simple and clear to me. To this day, my favorite part about internet marketing is building the website. So don’t fret. If making a website seems out of reach for you, I’m here to tell you it’s not.
How to Build a Website – Simple and Easy Step by Step for Beginners
The method we’re going to talk about is one of the easiest and most effective ways to build a website. It’s called WordPress, and by using WordPress you’ll be able to easily create, edit, update and pretty much do anything you want with your website. By following the steps outlined below, you’ll soon have your website up and running, and you’ll look back and think “that was it?”
1. The first thing you need to do to build a website is you must buy a domain name. A domain name is your website name with a .com (or .net or .org etc) at the end. An example of a domain name is momsbringhomethebacon.com. Every website and webpage have an “address” on the internet (called URL), and the domain name is the primary address for your website. Domain names can be purchased from many different places called Registrars, like Bluehost, Go Daddy, Hostgator etc. I personally use Bluehost and I highly recommend them. Domain name’s generally cost anywhere between $10-$15 to register for one year. Click here to register a new domain name with Bluehost.
2. The second step to building a website is you need to purchase hosting. Hosting is what makes your website actually show up on the internet. Without hosting, you can’t have a website. Think of it this way – websites have a lot of content, images, videos…we make a website and want to put all of that stuff in one place, right (on our website)? Well, all of that stuff has to be uploaded to the internet so that other people can see it. Hosting takes all of the files for your website and “hosts” them so that they’re visible on the internet. It’s really not as difficult as it sounds, I promise you.
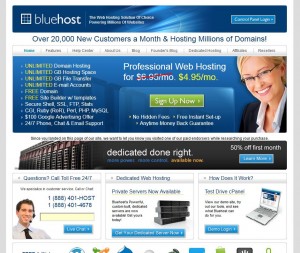 You can get hosting from many hosting providers, such as Bluehost, and Hostgator as examples. I also use Bluehost for my hosting. I find it easier to keep my domain registrations and hosting in the same account. It’s important to note – not all registrars can provide hosting. So if you buy a domain name from a different registrar that doesn’t sell hosting, you’ll still need to purchase it, and then point your name servers to the hosting account. So to keep it simple for the purpose of this tutorial, I recommend using Bluehost to buy your domain name and hosting. Hosting generally costs between $4-$20 a month depending on the plan you choose, and the hosting provider. For beginners, you probably don’t need all the bells and whistles of some (like resellers accounts or dedicated servers), so about $5-$7 a month should be about right. You just need a basic hosting account for now. Click here to register a new domain name and purchase hosting with Bluehost.
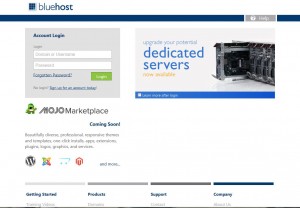
3. After you’ve gotten your domain name and hosting set up with Bluehost, the next step is to log in to your CPanel (you’ll get the welcome email from Bluehost once you have set up your account. (CPanel means control panel – it’s where you manage all of your domain names and hosting account stuff). It will look like this:
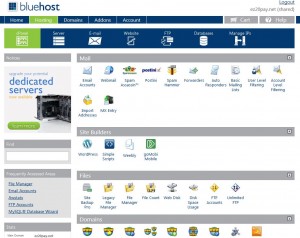
Once you log in, you will be taken to your main CPanel home screen which will have a lot of icons and things that may seem overwhelming at first. Don’t worry. You won’t need to mess with a lot of it. It will look like this:
4. The next step is to install WordPress on your domain name. (Another reason I like Bluehost is they have a one click option to install it…meaning we don’t have to do it manually. And of course, the theme of this tutorial is simple and easy.)
To install WordPress, look to the middle of the page, and under Site Builders (it should be the second row) and you’ll find a WordPress icon that looks like this:
Click on the WordPress icon. That will then bring you to another screen. Scroll all the way down to the bottom and find the Script list. Find the WordPress icon again and click it. Once that screen loads, click on the Install button on the bottom left. That will bring up a the install page. Select your installation preference (this should be your domain name), and then finish checking your options with steps 1-4. Agree to the terms and click “Complete”. Your install will now start and only takes a few minutes.
Once the install is complete, it will give you your log in details. Make sure you write them down, or save them to your computer.
5. Your WordPress website has now officially been installed and you can see your website by going to your domain name!
Okay, WordPress is Installed, Now What?
Now, the fun begins! Your website is now built – but as you know you’re not done yet. It’s not entirely built. By using WordPress, you have just essentially built a website shell. You now have a platform to easily create and edit and/or update a website and make it your own. Traditional HTML websites take a lot longer to build, and you have to make sure you make the pages uniform by using the same webpage templates…Wordpress has already done that for you.
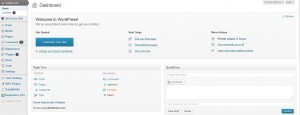
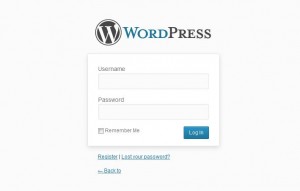 Log in to your WordPress admin panel with the log in information you got when you installed it. It will look like the image just to your left. Once you log in, poke around there for a little bit. You’ll see a lot of things you can do in there, and it keeps things organized. You can add new pages, or posts, you can chose a different Theme (which is basically the template layout for your website), you can create a whole website with the WordPress platform.
You don’t have to worry about knowing HTML or coding, because there is a WYSIWYG editor (What You See is What You Get – a very nice and easy way to create pages.)
When you first log in, you’ll be taken to your dashboard. This is where you will do everything you need or want to finish creating your website. To the left of the screen you’ll see a menu. Start there. Click on each menu item one by one and familiarize yourself with each of them. The 2 you’ll be using most is the Post and the Page. You’ll notice you already have 1 post, 1 page and 1 comment published. You can either delete them or edit them, whichever you choose. WordPress automatically creates them when installed for example purposes.
Hopefully I was able to provide you simple and easy step by step for beginners on how to build a website….now it’s up to you! Get started and have fun with it. Making a website is all about trial and error, and planning and creativity. You’ll find with the WordPress platform you have a lot of options and a lot of cool things you can do with your website.
I will dedicate another post specifically to using WordPress and how to customize it. I will add the link to that post back here when it’s ready. It’ll be a How to Build a Website Part 2, if you will. Subscribe to my feed so you don’t miss it!
Did you find this post useful or informative? Can I add to it or change it in anyway to make it better? Let me know – leave a comment! Also, if you liked this post, please share it with the buttons so others can enjoy it as well!
Are you building a website to make money online? Then you may like this post : How to Make Money By Blogging

